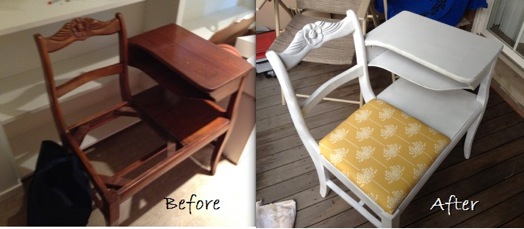
Laura just recently shared a before and after picture of a telephone chair she restored using SS Mum fabric and this is what she said,
"I purchased a piece of your mum fabric over the summer and just wanted to share the finished product. It's a family piece; vintage telephone table that has been refinished due to cigarette smoke in the wood and a need for new reupholstering. Your fabric added the perfect touch. thanks so much! And I love that you are sustainable!"
Thanks Laura for sharing!
Showing posts with label Project. Show all posts
Saturday, February 2, 2013
Friday, November 30, 2012
Chevron, Dots and Stripes Ornaments
Looking for project to do in a rainy/snowy day? How about sprucing up your old ornaments? We have these plain silver ornaments and added some patterns using glitter powders. Dots, chevron, stripes in candy colors. Just paint your pattern using glitter glue and sprinkle the powder on top of it. For a close up look, click on the image.
Monday, November 19, 2012
Fabric Letter
We just installed built-in bookshelves in Mila's room (will share pictures next week). I found this tutorial on how to make your own fabric letter. This is a great quick project to add personalization to your kids room and the whole project only cost me less than $5 (thanks to Jo-Ann's coupons).
Friday, November 9, 2012
Mila's Turkey Pumpkin
If you still have uncarved pumpkins from Halloween, this turkey pumpkin is a fun and easy project for kids of all ages to make. You can also use it as a decoration for your Thanksgiving's table! Even though Mila is only 2, she picked out all the color swatches herself. I helped her cutting them and she glued both sides together and put the skewers in. She's so happy and proud when we are done.
Materials:
- Pumpkins
- Paint samples/swatches
- Skewers
- Glue
- Paint
1. Instead of purchasing card stock, why not use some paint samples from your local hardware stores. We went to Home Depot and used Martha Stewart's paint swatches since they are a good size and the colors are great for the Fall! You need a total of 12 swatches for each pumpkins. 10 for the feathers and 2 for the head. Mila decided to do a rainbow one, so she picked out 12 different colors.
2. Draw a feather shape on the back of the sample and cut it out. Trace your cut to make the other 9. To save time, cut them back to back. Then draw a simple bowling pin shape for the head. Add simple two circles for the eyes and a triangle for the nose. Cut them back to back as well. Glue the two sides together. Make sure to leave an opening at the bottom for the skewers. I put them under a heavy book until the glue dries.
3. While waiting for the glue to dry, we decided to paint the pumpkins to make the feather's colors pop. Mila painted hers white, and I painted mine gold. I used a left over Martha Stewart's Tiger Eye paint from the Birch wall project.
4. Trim your skewers shorter and insert them in between the opening of the feathers and head.
5. Insert all pieces into your pumpkin and meet your turkey!
- Pumpkins
- Paint samples/swatches
- Skewers
- Glue
- Paint
1. Instead of purchasing card stock, why not use some paint samples from your local hardware stores. We went to Home Depot and used Martha Stewart's paint swatches since they are a good size and the colors are great for the Fall! You need a total of 12 swatches for each pumpkins. 10 for the feathers and 2 for the head. Mila decided to do a rainbow one, so she picked out 12 different colors.
2. Draw a feather shape on the back of the sample and cut it out. Trace your cut to make the other 9. To save time, cut them back to back. Then draw a simple bowling pin shape for the head. Add simple two circles for the eyes and a triangle for the nose. Cut them back to back as well. Glue the two sides together. Make sure to leave an opening at the bottom for the skewers. I put them under a heavy book until the glue dries.
3. While waiting for the glue to dry, we decided to paint the pumpkins to make the feather's colors pop. Mila painted hers white, and I painted mine gold. I used a left over Martha Stewart's Tiger Eye paint from the Birch wall project.
5. Insert all pieces into your pumpkin and meet your turkey!
Thursday, February 24, 2011
Blossom Button-Tufted Bench
Shoki recently purchased SS Blossom fabric and commissioned Flotsam Furniture to build a custom button-tufted bench for an entry space. And look how it turns out...great craftsmanship by Nick Sario of Flotsam Furniture!
Labels:
Project
Thursday, February 17, 2011
Lather Creations Bench
Lenore of Lather Creations truly has a great vision. She restores vintage furniture and has used Swanky Swell fabrics in some of her projects. The latest one is this tall bench. She paired this Victorian style bench with SS Heritage fabric and look how fresh and modern it looks now! And the best part was she sold the bench within few hours of posting it. Check out her complete before and after here. Thank you Lenore always for sharing!
Labels:
Project
Tuesday, February 15, 2011
Kate's Mid Century Stool
Today's before and after picture came from Kate of Olives and Daisies. She found this mid-century stool on ebay and reupholstered it with SS Raindrops Split Pea fabric! Look how modern and chic it looks! Thanks Kate for sharing!
Labels:
Project
Thursday, February 3, 2011
Sarah's Nursery Bedding
Sarah recently shared pictures of the nursery bedding she made with SS Daydream fabric. Isn't it lovely? And the coordinating wall colors....very modern and chic! I can't wait to see the rest of the space. Thank Sarah for sharing these pictures!
Labels:
Project
Wednesday, December 8, 2010
Belyn Design
I'm proud to introduce Leanne of Belyn Design who produce custom eco-friendly handmade bags. Each bags are made to order to your specification. She also has five fabulous styles of handbags in her shop where you can choose your own fabric including Swanky Swell organic collection: Blossom, Mum and Ginkgo. Lovely concept! They make such a great gift too. Great work, Leanne!
Thursday, December 2, 2010
Kara Studio Chair Makeover
Just want to share a chair makeover done by Kara Studio in my Foliage - Split Pea fabric. Isn't it lovely? It's available for sale on her etsy shop here. Thanks for sharing Kara!
Labels:
Project
Friday, October 15, 2010
Monday, October 4, 2010
Lather Creations Harp Back Chair
Lenore of Lather Creations sent me pictures of a harp back chair she recently restored with my Doiliez fabric. Isn't it lovely? The blue paint really compliments the fabric. What a great transformation! You can also check out her shop here. Thanks Lenore for sharing!
Labels:
Project
Tuesday, August 10, 2010
DIY - Lampshade
I have this end-of-bolt fabric from my organic collection, Mum. It's only 9" in length. So I decided to recover one of my lampshades with it. Thanks to this video tutorial by howcast.com, it made the process so much easier.
Labels:
Project
Tuesday, August 3, 2010
Awesome Clutches
I always appreciate when customers share what they made with Swanky Swell fabric and the latest ones are these fabulous clutches from Mimi Marie and Kaleidoscope by Erin. Aren't they lovely?


Thank you both for sharing!
Labels:
Project
Monday, August 2, 2010
Victorian Settee
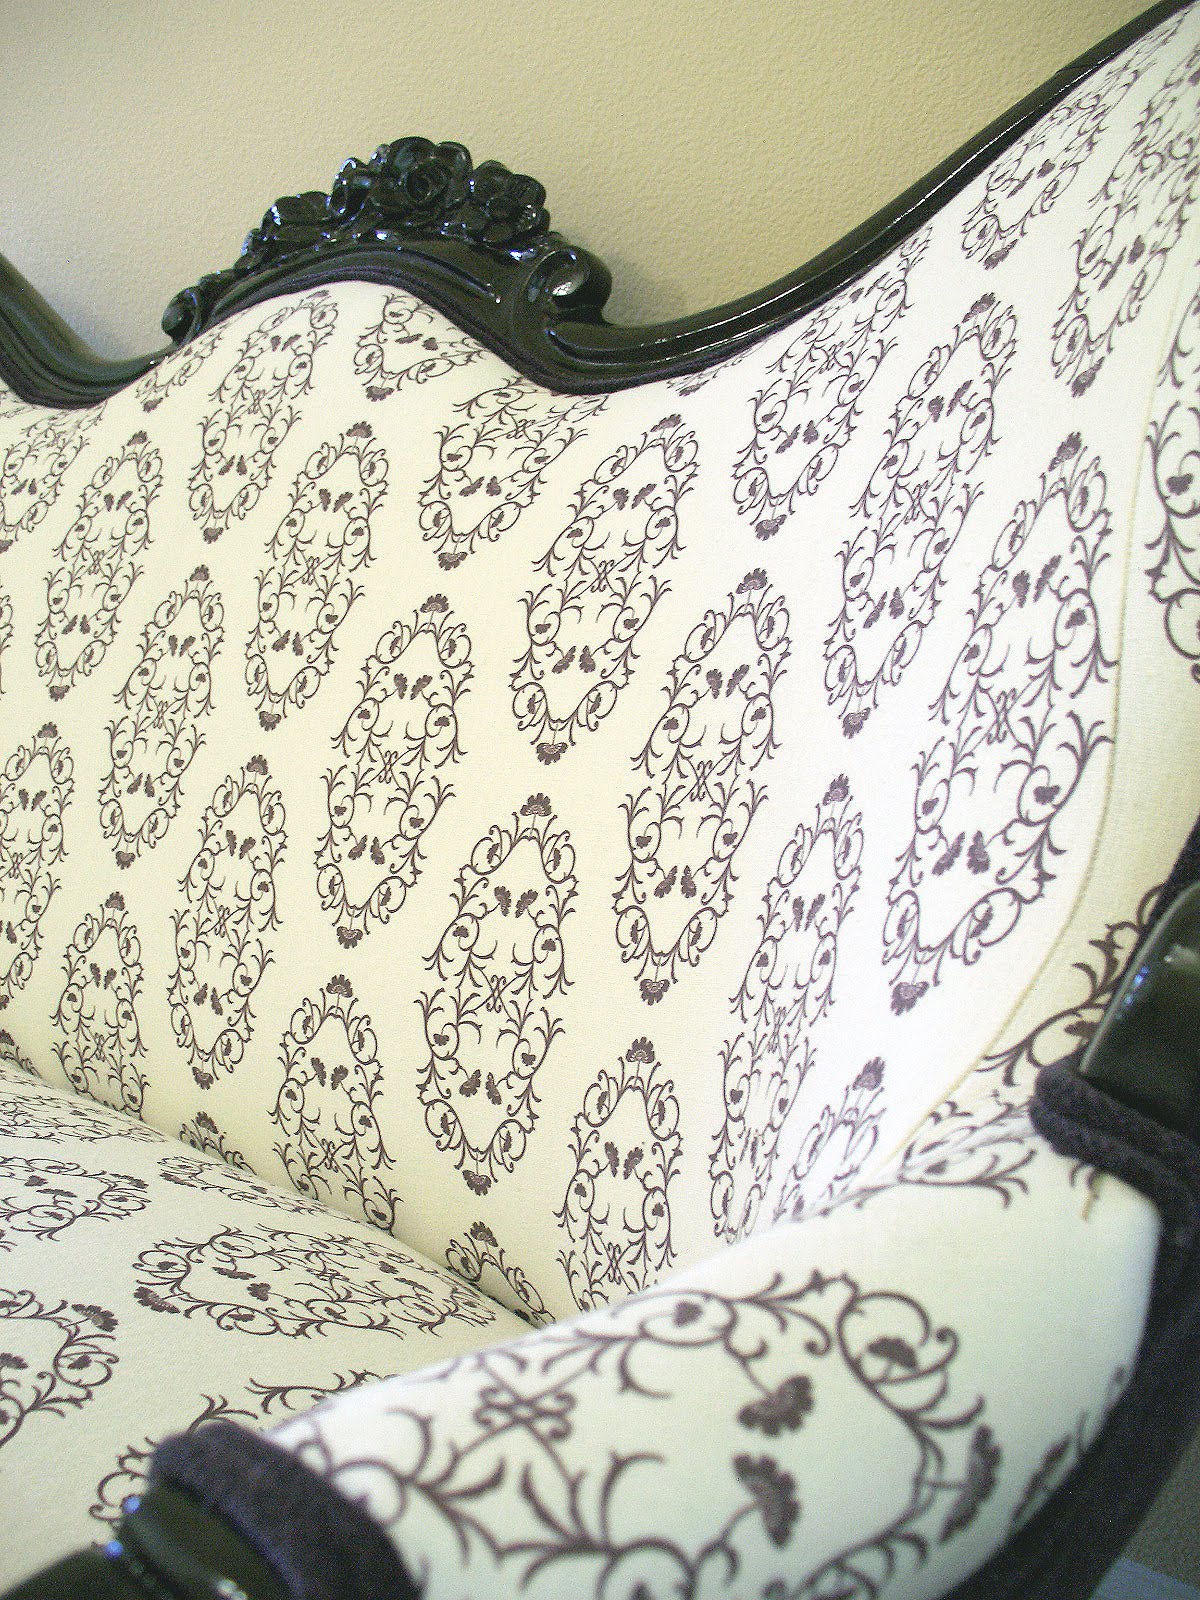
I found this vintage Victorian settee on Craigslist and saw a potential in restoring it. It has a really nice shape and I thought it will be very elegant to marry it with my Ginkgo fabric . So voila...
Tuesday, July 27, 2010
Blossom Pillow
Thought I share with you a little project that I did over the weekend; a pillow using my Blossom fabric.
Labels:
Project
Wednesday, July 21, 2010
Thank you Indie Fixx!
Thank you Jen of Indie Fixx for sharing her project using my Pompon Dahlia fabric. To view the complete post, please click here.


Thursday, June 24, 2010
Floor Cushion
I haven't sewn for a while and decided to get my groove back on. Inspired by this wonderful tutorial by Living with Punks, I made this floor cushion with my Raindrops - Split Pea fabric. Made a few boo boo :(, o well, I enjoyed making it and love the outcome!


Friday, June 18, 2010
Wusketeer
Wusketeer purchased my Raindrops fabric at the Craft Happy fair we participated together. They make the cutest pouches and purses. They also repurposed old clothings and turn them into recycled pouches! Definitely worth to check them out!


Labels:
Featured Designer,
Project
Monday, April 26, 2010
Stacy's Before and After Chair
When I designed the Foliage pattern, I never thought it would be used for a large upholstery project such as chair or sofa due to the boldness of the prints. I was thinking more for smaller upholstery and craft projects such as chair or bench cushions, pillows, curtains, bags or purse. Boy, I was wrong!

Stacy just sent me this before and after picture of a chair she did with my Foliage fabric in Split Pea. I was astonished! I can't believe how modern, fun and whimsical the chair looks. I'm so happy that she shared it with me and I'm able to show it to all of you. She has a remarkable vision! Thanks Stacy for sharing! This chair definitely makes a statement and I hope it will be a conversational piece!

Stacy just sent me this before and after picture of a chair she did with my Foliage fabric in Split Pea. I was astonished! I can't believe how modern, fun and whimsical the chair looks. I'm so happy that she shared it with me and I'm able to show it to all of you. She has a remarkable vision! Thanks Stacy for sharing! This chair definitely makes a statement and I hope it will be a conversational piece!
Labels:
Project
Subscribe to:
Posts (Atom)